I am so excited about today's post because I finally got my first
set of indie polish and I had an opportunity to interview their maker. I have
been ogling beautiful indie polishes that are posted all over the Internet but
have been reluctant to make the leap into the indie world. An opportunity arouse that I couldn't refuse
so I took the plunge.
I discovered Lucky Lacquers through Instagram and have been
drooling over the lovely bright 5-free creme polishes for weeks . She ran a
promotion that made it so much easier for me to cave, so I purchased the entire
Fleur series. I am not disappointed
even a little with the quality, the color, or the service I have received with
my Lucky Lacquer purchase.
Before I place my order, I contacted the owner, Aruna, and we
communicated back and forth a bit before I finalized my order. She was always
courteous with her responses and very quick with each communication. Her caring
responses gave me the feeling that she really values her customers which made
me confident with making the purchase.
My first surprise came when I received my purchase, it was so
cutely packaged. Each bottle was boxed, and most had hand tied ribbons as well.
I felt like I was receiving a gift! I almost didn't want to take the bottles
out of their boxes but of course, I had to and couldn't resist using them for
very long.
In addition to the adorable packaging the bottles themselves are
slightly unique. What I like about Lucky Lacquer bottles is that the bottles
are an interest rectangular shape that makes them different than most but are
still easy to store and display. The the Lucky Lacquer logo labels are simple
and chic and fit the bottles perfectly. These bottles are 12 ml bottles choke
full of beautiful opaque goodness.
I'm sure by this point your on the edge of your seats waiting to
see these lovely polishes, right? So, on
to the swathes...All the swatches you will see on this blog post are done with two
coats, though some of these colors, especially the darker shades only really
needed one coat. The photos are taken under 75w LED daylight bulbs and are not
filtered. They are also shown without a top coat of any kind.
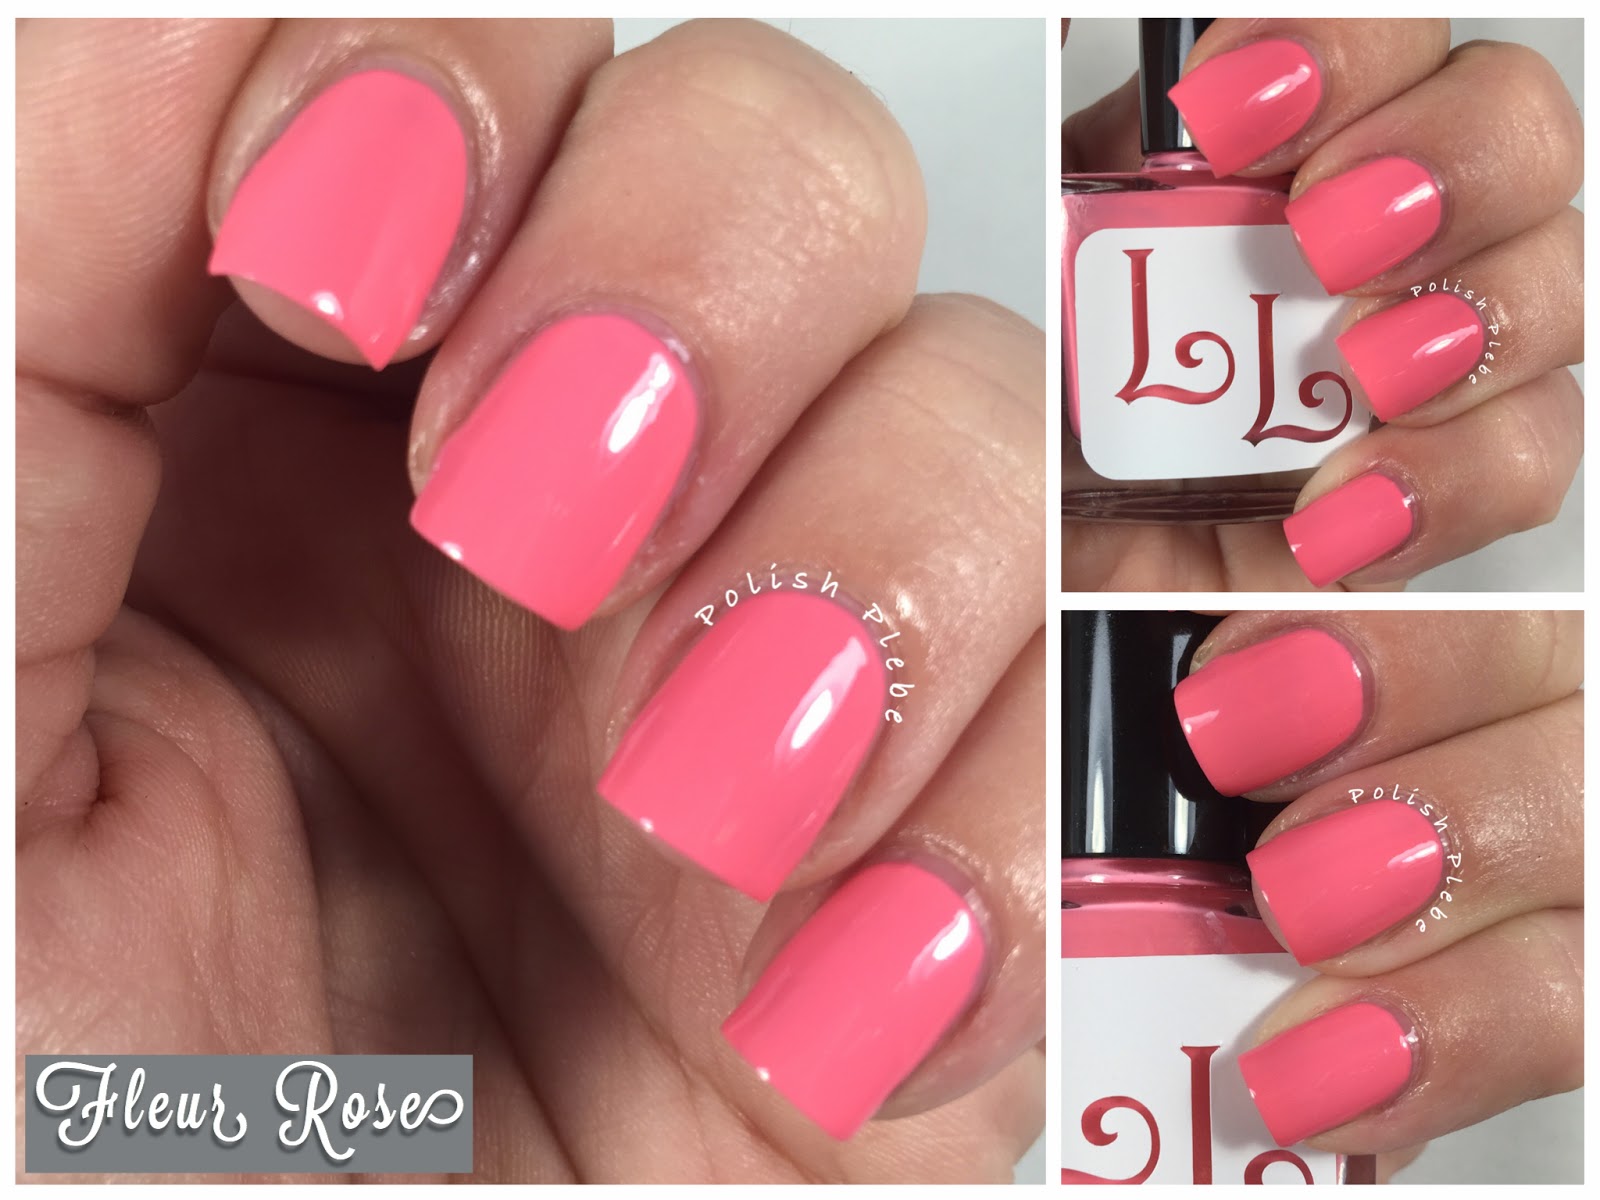
First up is the soft pink "Fleur Rose". This pink shade
has a slightly coral hue against my skin tone. It is a very easy color to wear
and is great for just about any occasion.
This gorgeous pink is "Spring Charm" it is both rich
and warm and just makes me long for spring time. It is so cheery and inviting, I want to wear
it all the time.
Lovely, lovely "Lavender"! This is a beautiful medium
tone purple that leans just a little on the deep side. I'm not a huge fan of
purple shades but this really compliments my skin tone.
"Teal We Meet Again", this color is absolutely amazing!
It is a deep teal green with the most fantastic formula. This was opaque with
one coat but I applied two for good measure. I think this makes a great fall
shade because of its richness.
This medium green shade is "Mint Daisy". To me it's
kind of a hunter mint shade that is strangely warm (in a good way). This is a
great color for the coming seasons and I already plan on featuring it in some
of my holiday nail art designs.
This bright, pastel, neon green is "Bells of Ireland".
Is this not just the most eye catching green you've ever seen? This is great
for accenting a design or wearing on its own, it really is a gorgeous color.
Say hello to "Dahlia". This lovely polish is a purple
shade that has pink tones to it. I consider this a fuchsia color. It is so
pretty, especially in person.
This little cutie is perfectly named, "Sweet Pea". This
is a light, neon pink with just a touch of peach. I wore this over the weekend
and I got many, many compliments on how wonderful it is.
In most collections I have acquired there is one polish that
surprises me. In this collection "Alpine Phlox" was the surprise. In
the bottle this polish appears to be a soft grayish, pinkish, purple but when I
applied it, it took on a whole different life. Against my skin this appears to
be more of a soft pale pink. This is the most gentle color in the group and its
just perfect. It's great for wearing to work, or family outings, or anytime
really.
Saving my favorite for last, "Forget Me Not". This is
an awesome light, neon blue. I've said it a gazillion times before and I'll say
it again, I'm a sucker for blue shades, and I am head over heels in love with this color. Like a few of the other shades in
this collection I already instead to use this polish in upcoming holiday nail
art designs.
So, there you have it the complete Lucky Lacquer Fleur series. If I was to use one word to describe this collection it would be, perfect! The formulas are rich and creamy, the
opacities are strong, and the colors are phenomenal. I was also surprised at
how quickly the polishes dried without the use of drying drops or top coats.
They dried much quicker than other polishes I have experience with. I also
really like the width of the applicator brush, it is nice and wide, and if there is
one thing I have learned it is that a wide brush equals quicker application. I am so impressed with my Lucky Lacquer polishes that it will be hard for me to look at name brand polishes the same.


.jpg)


