Showing posts with label negative space. Show all posts

Tuesday, June 23, 2015

Negative Space and Fanbrush

Hello Lovelies!  I know it has been about a week since I last posted any new nail art.  I took some time to hang out with family and friends, it was a whirlwind weekend and I'm just getting caught up.  I created this manicure for last week's Freehand Challenge fanbrush prompt (better late than never, I suppose)...


To be honest, I really didn't know what to create for the fanbrush prompt but I really wanted to do a negative space manicure.  It has been awhile since I have created one so I thought it was time.

Materials I used
Base coat - INM Ridge Free
Binder reinforcement dots
White base polish - Color Club 'Blank Canvas'
Liquid Latex - Ellagee 'Lickity Split Mani Mask'
Fanbrush polishes - Color Club 'Midnight Mulberry,' 'New-tral,' & 'Get a Mauve On It'
Fanbrush
Top coat - I. A.M...Custom Color 'Diamond PRO'


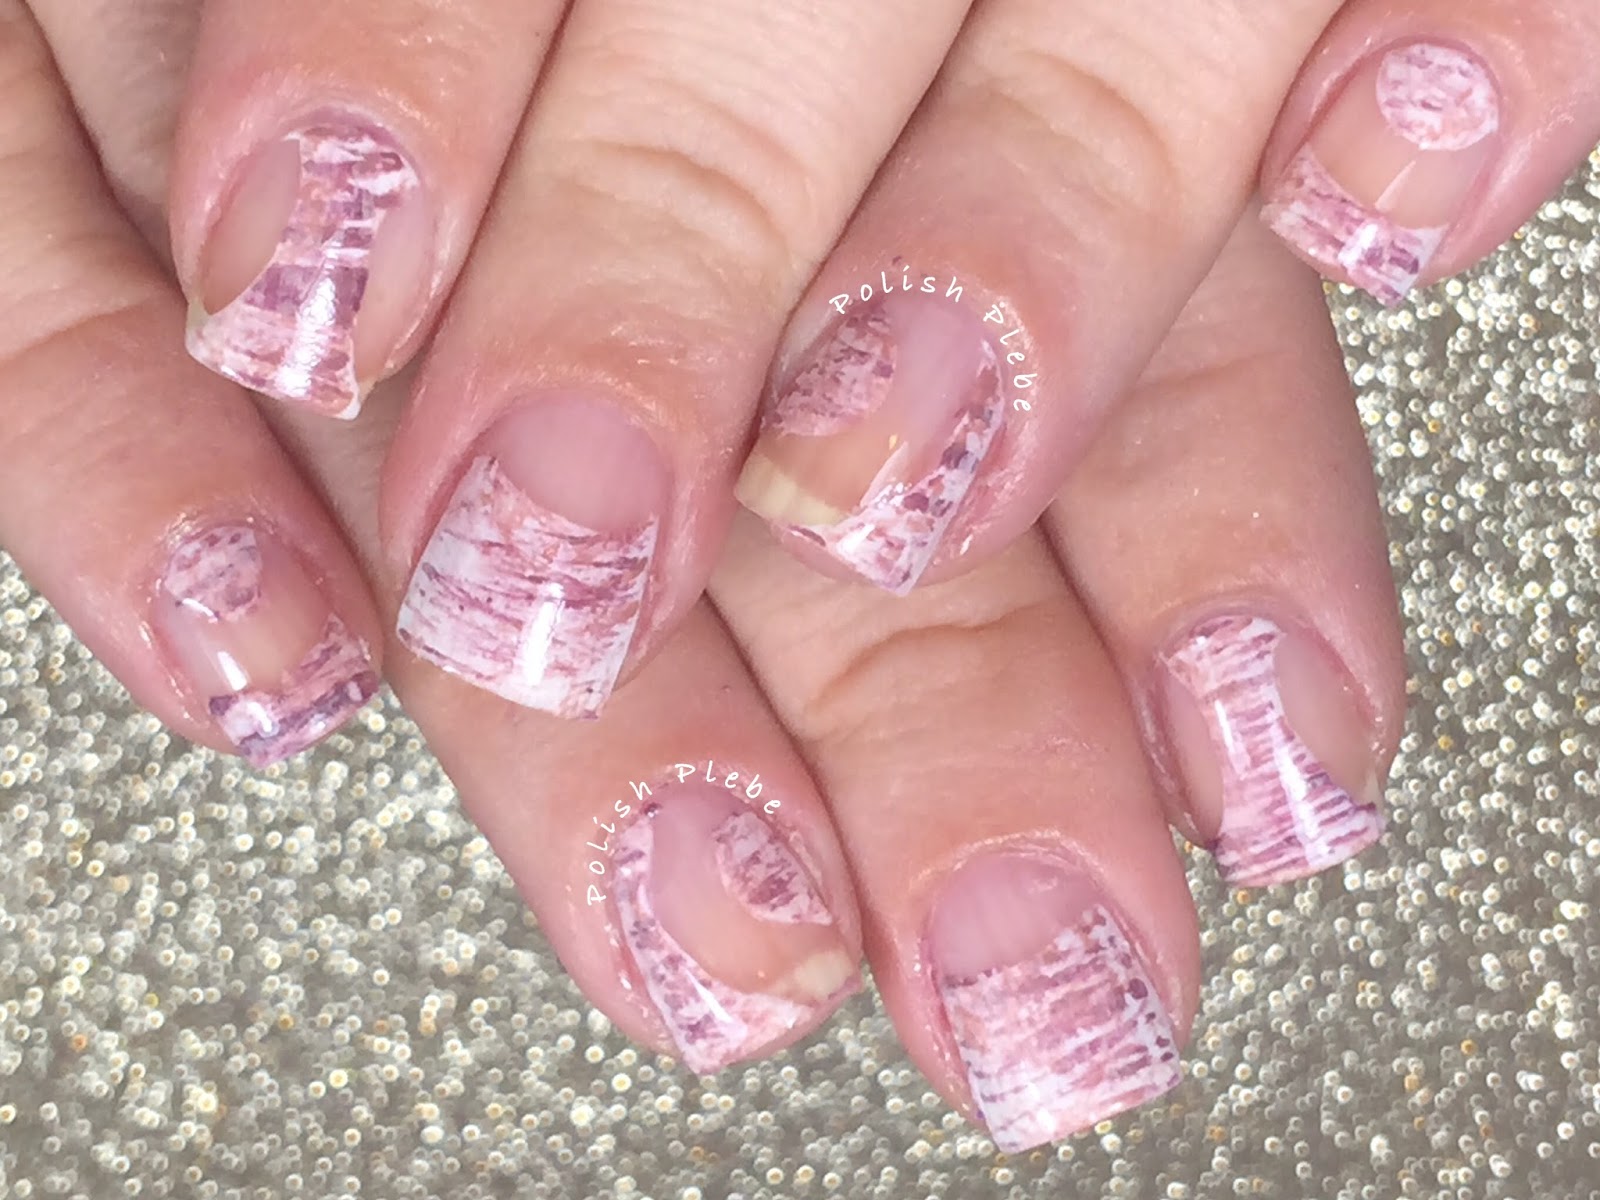
I started this look off with my INM Ridge Free base coat.  This base coat is great for negative space and French tip nail art designs because it is pink.  Not to mention that it is a ridge filler so if you have ridged nails like I do they will even out those perfections easily.  You can see on my ring finger some striations (the darker vertical lines on my tip)  these are actually ridges that go all the way up my nail, but you can see the ridge filler makes my nail nice and even.


Using binder reinforcements  I covered different areas of my nail.  I then painted my white base color and immediately removed the reinforcements.


I used the reinforcement dots in different positions on each of my fingers to creating interesting negative spaces on each one.  I would have been happy to leave it here, but this is for the fanbrush prompt so I continued on.


At this point you could wait for the white base coat to dry or apply a quick drying top coat and reapply reinforcements to cover the negative space.  However, because this is for the Freehand Challenge I felt I needed to do more freehand with this design.  After giving the white a little time to dry, I used liquid latex to protect the skin around my nail and to fill in the voided areas.  With the negative space covered, I layered three shades of polish by swiping the fanbrush in different direction with each color, horizontally, vertically, and diagonally.  (Follow pictures from the top right, down, then across the bottom.  The larger picture in the top left is the finished design.)


Once satisfied with the brushing remove all the latex, perform a bit of clean with acetone and a brush, and apply a topcoat.


I'm glad I decided to go with softer slightly more neutral colors for this nail art design, I feel it compliments the negative space nicely.  I also liked using the reinforcement dots, creating interesting curved lines was a good change.  The design on my pinky is my favorite.  Do you have a favorite?


I really hope that I can create a few more nail art designs for you this week, but we will have to see what my schedule will bring.  I'm sure many of you will agree that having responsibilities can be a pain.  I appreciate you taking the time to take a peek at my blog. I hope you enjoyed this design, and found the tutorial useful.  Thanks for stopping by, see you next time.

 Your Fellow Plebe,

Thursday, January 15, 2015

Liquid Eyeliner Nail Art

Hello Lovelies!  A few weeks ago I was scrolling through Facebook when I spotted a post from Nail It Magazine.  It was a tutorial in which the artist used liquid eyeliner as a medium for creating a nail art design.  Sadly, I never made note of who the artist was and can no longer find it, so if you know who it is that I am referring to I would love some insight.  Anyways, I decided to try it out for myself.


I started off this nail art design with Butter London 'Nail Foundation' on my ring and mid finger, and Butter London 'Baroness' on all other fingers.  I decided to use the nail foundation because I wasn't sure if my nails would be stained by the liquid eyeliner.  I also decided against using a typical base coat because the finish on the nail foundation is more of a satin finish that would be less "slick."


I started off my liquid eyeliner design by framing the nail.


I decided that I didn't want to make the design too complicated so I just drew some simple curly-q's and squiggles to fill in the nail.


I also decided that I wanted to give 'Baroness' a little gradient, so I sponged Salley Hansen's Big 'Smokey' Top Coat over the tip of my nails (excluding the accent fingers).


In all honesty, I didn't care for how my liquid eyeliner applied.  It was a bit streaky and I had to go over some spots multiple times to get consistent lines.  I did however, like that it dried really quickly.  I think if I was in a bind and really wanted to create a design I might try this again.  But I think that using acrylic paints or polish is a better medium than the liquid eyeliner.


I do like the design though, I like the negative space on the accent nails, and 'Baroness' is a nice subtle color.  I hope you found this post insightful, and enjoyed this nail art design.  Thanks for stopping by, see you next time.

Your Fellow Plebe,


Friday, November 21, 2014

Studded Negative Space Manicure

I wanted to do something a little different, something outside my comfort zone. Since, negative space manicure are very popular right now, I decided to give it a try. On many of my fingers the design is based on the arrangement of the studs so the steps were done in a slightly unusual manner.

Materials
Base and top coat
French base (optional)
1-2 shades of polish
stripping brush
Studs

I started of with Butter London's 'Nail Foundation'.  I don't typically use a french manicure base, but since I finally have some I decided to go ahead and use it.


I placed studs on my thumb, mid, and pinky.  These studs are item #7277 from bornprettystore.com.  As you can see I used a variety of gold studs and arranged them differently on each nail.


Using China Glaze 'Community' and a thin stripping brush I outlined the studs leaving a gap to create my negative space.
 \


I then used Butter London 'All Hail the Queen,' one of my new favorites polishes, to fill in the positive space.


I also added some studs to my pointer and ring finger, these studs are item #12411 also from bornprettystore.com.


I touched up my border lines between my negative and positive space (the dark brown line).  I then performed some clean up, and added a top coat to seal in the design and help contain the studs.


I really like the gold studs I used in this manicure. If you purchase from bornprettystore.com use coupon code: CREATEX31 for 10% off your next purchase.  I enjoyed this nail art design much more than I though I would.  I hope you enjoyed this manicure too.  Thanks for stopping by, see you next time. 

Your Fellow Plebe,


Social Gadgets

Random Nail Art

Background