Showing posts with label studs. Show all posts

Monday, July 11, 2016

Studded Bow

Hello Lovelies! I have another mani recreation this evening for this week's "All in the Family" Nail Art Nation prompt. This one features another very talented artist,  Jessica Guilbe, aka @lolitajess. Jessica's designs always have a very feminine flair to them. I particularly like the way she uses charms and studs in her designs.  Here is my recreation of one of her designs:


Products/tools:
Basecoat
Gothic Gala Lacquer "Gigglemug"
Pueen image plate 25
Mundo de Unas "Silver" stamping polish 
Fab Ur Nails Stamper
Studs
Glossy topcoat Glisten and Glow "HK Girl"

Here is Jessica's original design:


I started off with "Gigglemug" as my base color. 


Than using a similar but not as pretty image from Pueen image plate 25 along with silver (instead of gold) stamping polish stamped the image on three nails. 


Then just as Jessica did a created a bow on my accent nail using studs. I too added another single stud to my mid finger. 


As always I finished up with a bit of clean up and a glossy topcoat. 


Checkout Jessica and all her lovely designs either on her Google+ page or on her Instagram @lolitajess. You won't be disappointed. I hope you enjoyed this recreation. Thanks for stopping by, see you next time. 

Your Fellow Plebe,


Monday, October 5, 2015

Art Deco Inspired Nails

Hello Lovelies!  I am in love with the Roaring 20's, the fashion, the lifestyle, the architecture, and the décor.  So when Nail Art Nation announce this week's prompt is the Roaring 20's I couldn't wait to get creating.  As a former interior designer I'm obsessed with anything Art Deco, so this nail art is a simple Art Deco inspired design...


Materials I used:
Basecoat - SuperChic Lacquer "Bring It On!"
Polishes - Sinful Colors "Snow Me White" & "Black on Black", Gothic Gala Lacquers "The Enterprise"
Iridescent topper - Color Club "Concrete Jungle"
Striping tape
Chevron vinyls from NailVinyls.com
Small rhinestones
Topcoat - SuperChic Lacquer "Marvel"

To create this look I began with one coat of white polish topped with an iridescent shimmer polish and a quick drying topcoat.  Now I know most people think of black and gold color schemes when they think of the 20's but I decided to change it up just a little bit.


With the base dry, I used striping tape to create a fair sized vertical stripe off center of the nail.  I filled in the tape with a soft metallic grey.  After removing the tapes I applied a quick drying topcoat, just over the stripe.  I did not apply quick drying topcoat over the entire nail in order to prevent the final finish from being too thick.

Once this layer was dry, I used two chevron vinyls.  By lining them up point to point I was able to create a diamond pattern.  I found that connecting the points with as little overlap as possible gave the best diamond shape, in fact the ones pictured below are overlapped a little too much.  I placed the diamonds roughly center of the nail, slightly overlapping the grey stripe.  I filled in the diamonds with black polish and removed the vinyls.  Lastly, using topcoat as an adhesive I applied a rhinestone between the diamonds.

As usual I finished off with a bit of cuticle cleanup using gentle acetone and a brush, and applied a final layer of quick drying topcoat.


I'm such a huge fan of the Roaring 20's that I even had my wedding reception in a replica speakeasy and I made all my guest dress period appropriate.  I have to say seeing my Grandmother dressed up like a flapper was the best wedding present ever!  So when I say I love the Roaring 20's I really do mean it.


If I have time this week I will most likely create another 20's inspired nail art design, because I have a least a billion more ideas of what I could create for this prompt.  I hope you like the 20's and enjoyed this nail art too.  Thanks for stopping by, see you next time.

Your Fellow Plebe,


Friday, January 9, 2015

Orly Rebel Chic Gift Set

Hello Lovelies! Today, I'd like to share a manicure I created using the Orly Rebel Chic Gift Set I got for a Christmas prezzie from one of my good friends.  I don't have a lot of experience with Orly polishes and this is the first nail art gift set that I have ever received.


The kit came complete with a polish, several studs, three rhinestone studded skulls, adhesive, and an orange stick.  I thought it odd that it came with an odd number of skulls, since they are the primary accent you would assume they'd supply and even number.  Maybe they give you three in case you lose one?

As I said previously, I don't have much experience with Orly polish.  Orly is a unique brand in my area and is not easy to find.  In fact, the only other Orly brand I own, I won in an Instagram giveaway.  I am so pleased with this Orly polish, it's called 'Iron Butterfly' and I own nothing like it.  It is a dark gray, blackish polish with silver metallic sparkles, and it drys to a matte finish.  I just think this is one of the coolest polishes ever!


For this nail art design, I decided to pair up this Orly with a metallic gray from my Butter London Steampunk collection, 'Earl Grey.'


Over the 'Earl Grey' I used stripping tape and on my pointer created a wide vertical stripe and a criss-cross on my ring finger.


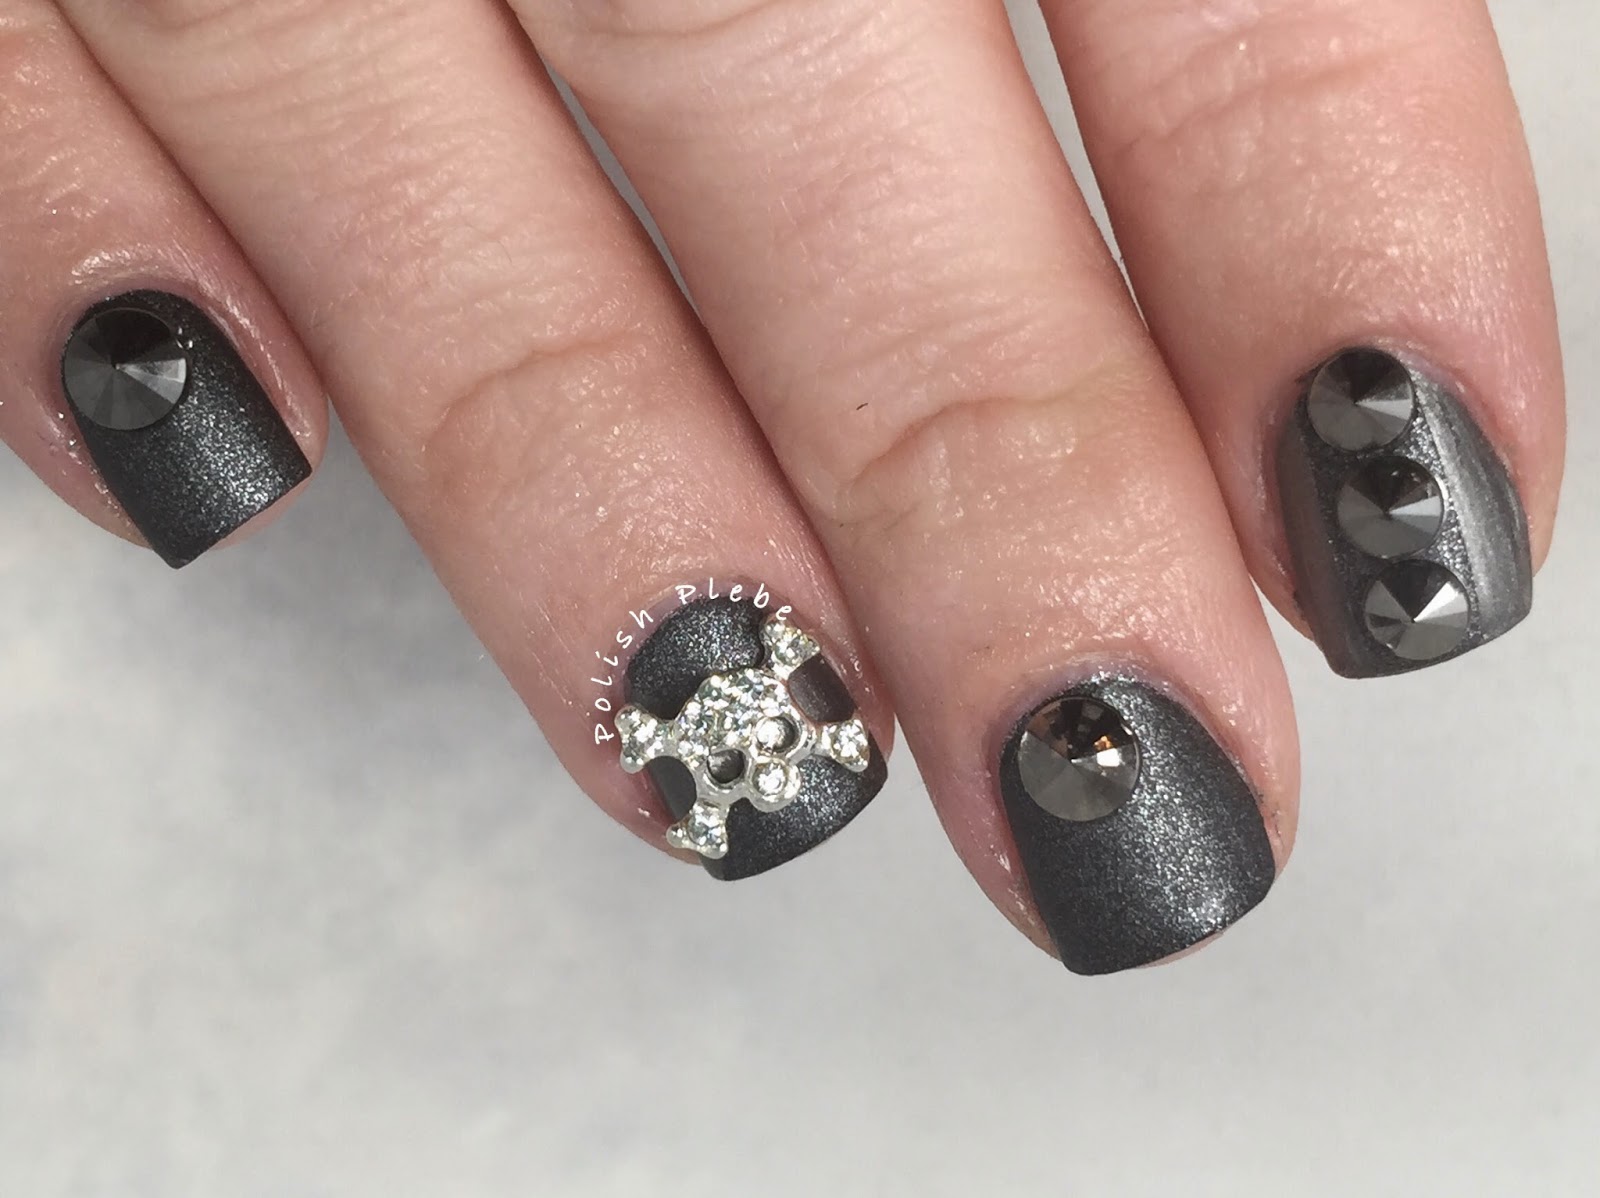
I filled in the center strip and the top and bottom of the criss-cross with Orly 'Iron Butterfly.'


I finished off the design, accenting with the skull nail charm and the spiked studs to create this look...


I am really in love with this metallic matte black polish from Orly and that skull charm is pretty rocking too!  I'm hoping to find some more Orly polishes soon, I am very impressed with the two that I own.  What do you think of Orly?  I'd love to hear your thoughts, in the comments down below.  I hope you enjoyed this nail art design, thanks for stopping by, see you next time.


Your Fellow Plebe,


Friday, November 21, 2014

Studded Negative Space Manicure

I wanted to do something a little different, something outside my comfort zone. Since, negative space manicure are very popular right now, I decided to give it a try. On many of my fingers the design is based on the arrangement of the studs so the steps were done in a slightly unusual manner.

Materials
Base and top coat
French base (optional)
1-2 shades of polish
stripping brush
Studs

I started of with Butter London's 'Nail Foundation'.  I don't typically use a french manicure base, but since I finally have some I decided to go ahead and use it.


I placed studs on my thumb, mid, and pinky.  These studs are item #7277 from bornprettystore.com.  As you can see I used a variety of gold studs and arranged them differently on each nail.


Using China Glaze 'Community' and a thin stripping brush I outlined the studs leaving a gap to create my negative space.
 \


I then used Butter London 'All Hail the Queen,' one of my new favorites polishes, to fill in the positive space.


I also added some studs to my pointer and ring finger, these studs are item #12411 also from bornprettystore.com.


I touched up my border lines between my negative and positive space (the dark brown line).  I then performed some clean up, and added a top coat to seal in the design and help contain the studs.


I really like the gold studs I used in this manicure. If you purchase from bornprettystore.com use coupon code: CREATEX31 for 10% off your next purchase.  I enjoyed this nail art design much more than I though I would.  I hope you enjoyed this manicure too.  Thanks for stopping by, see you next time. 

Your Fellow Plebe,


Wednesday, October 1, 2014

Painted Star Stud Manicure


This #whatruwearingwed manicure I wanted to do something somewhat simple and use some water decals that I have had for a bit from bornprettystore.com. I also wanted to try painting some studs that I have. I have seen this done on various YouTube and Instagram videos.

I started this design with two coats of Revlon 'Metallic' topped with a coat of Seche Vite.  This polish looks like molten silver to me.


On my ring finger I applied these cute star and moon water decals. They are item #8116 in pattern D196 black.  These are curved as if for french tips but because my nails are not long enough I placed
them up near my cuticle and trimmed the access.


On the rest of my fingers I placed silver nail art studs also from bornprettystore.com, item #7277, that I painted with black polish.


I really like the idea of painting studs.  I can't tell you how often I wanted to add studs to a design but didn't want to add just plain ol' silver or gold but didn't have a color that would work well.  The option to paint studs leaves endless possibilities because you can use almost any polish in your arsenal accent with.


If you make a purchase with bornprettystore.com use coupon code: CREATEX31 for 10% of your purchase.  You can use this code anytime, it never expires so right it down and use it every time.

I hope you enjoyed this #whatruwearingwed manicure and I hope you'll share what your wearing on your fingers today too.  Head over to my Facebook and post your pictures with a description there, or if you prefer Instagram hashtag #whatruwearingwed and tag me, @polish_plebe so that I can find it easily.  Please like/follow me while your there or you can follow me by clicking the 'Join this Site' icon on the top right hand side of the screen or through Google+Bloglovin, and/or Pinterest.  Thanks for stopping by, see you next time.

Your Fellow Plebe,


Social Gadgets

Random Nail Art

Background