Showing posts with label whatruwearingwed. Show all posts

Wednesday, December 3, 2014

Glitzy Gift Wrapped Nails

Today's #whatruwearingwed nail art design is the second nail art entry for NPQ's 12 Days of Christmas nail art challenge: "Eleven Pretty Presents".  I personally like my presents wrapped in fancy papers with big bows.


Materials
Base and top coat
Glitter polish
Red polish
Black polish
Stripping brush

I started this design off with Milani 'Gold Glitz.'  I found this polish recently at my local dollar store and couldn't pass it up.  If you have a dollar store near you I recommend you check it out periodically.  I was really amazed to find this gorgeous glittery gold there.  This is a two coat application.


I then used China Glaze 'Seeing Red' from the Giver collection and a stripping brush to draw horizontal lines across my nails.  I drew this slightly higher than I would for a french tip but not quite at the mid point of my nail.


On my accent finger, in this case my ring finger, I drew a vertical strip down the middle of my nail with the same red.


I then began drawing a bow in the red polish in the middle of my t-shape on my ring finger.  I started the bow of by drawing an x-shape over the center of the t-shape.  I then enclosed the ends of the x-shape and filled it in.


I finished off the look by using Sinful Colors 'Black on Black' and the same stripping brush I used previously to outline my ribbon and bow.


These nails are so cutely wrapped, ready to be set under the Christmas tree.  Now I just need to get my Christmas tree.  Don't forget to head over to my Facebook page and post your #whatruwearingwed manicure.  You can also use the previously mention hashtag on Instagram, and tag me @polish_plebe in the comments so that I can find it easily.  Please be sure to like and follow me while you're there. You can also like and follow me by clicking the 'Join this Site' icon on the top right hand side of this page, or through Google+Bloglovin, and/or Pinterest.  I hope you enjoyed this nail art design, and I really hope you'll share what's on your fingers today, thanks for stopping by, see you next time.


Your Fellow Plebe,

Wednesday, November 26, 2014

Tweed Nail Art

Winter is on its way here in the Northeastern United States for some of us its already here. With temperatures dropping and snowy weather moving in, many of us are looking for ways to stay warm. Heavy coats and sweaters are being brought out of storage and put to good use. I wanted to create a warm and interesting nail art design and what I came up with was this tweed like print.


Materials
Base and top coat (matte optional)
4-5 shades of polish
Stripping brush

I started with a nude base color, China Glaze 'Don't Honk Your Thorn' from their City Flourish collection. I know I just used this with Monday's design but it'll mostly be covered up by the end of this tutorial anyways.


I then started adding layers using the dry drag method. I do not have pictures of this method but it seems pretty simple to explain. The dry drag method is when you remove as much of the polish from the applicator brush by wiping on the side of the bottle. I also swiped my brush on a paper towel before application.

The first layer of dry drag was China Glaze 'What are You A-Freight of?' from their All Aboard collection. I did not cover the nail completely but did a staggered brick pattern horizontally across the nail. This left some blank space but no worries there are more layers coming.


For the next layer of dry drag I used China Glaze 'Don't Get Derailed' also from the All Aboard collection. I concentrated on filling in the slightly bare areas and brushed vertically this time allowing the layer to overlap the previous one a bit.


Next I added in some tweed stitches, I used China Glaze 'Well Trained' another from the All Aboard collection and a stripping brush to create thin vertical lines and t-shapes.


I repeated the previous step using China Glaze 'Swing Baby', I'm not sure what collection this is from but it's a favorite of mine that I purchased at the beginning of my nail polish addiction.  You'll notice I used all cream colors except this last one. I felt it need a little sparkle but not too much because there are not too many sparkly tweeds out there.


I did my clean up and add a matte top coat. You could of course use a regular top coat of youd like but I feel the matte top coat gives it a slightly more realistic affect.


I'm actually really enjoying this nail art design; it's one of those ones that look better in person than it does in pictures. This is a great fall/winter nail art design, it incredibly easy, perfect for beginners, and I hope you'll try it out. 


Don't forget that it's #whatruwearingwed. Head over to my Facebook page and post your nail art designs there or use the hashtag on your Instagram pictures and tag me in the comments so that I find it easily. Please like and follow me while youre there or follow me by clicking the 'Join this Site' icon on the top right hand side of the screen. You can also follow me through Google+Bloglovin, and/or Pinterest. I hope you are all staying warm and cozy, thanks for stopping by, see you next time. 

Your Fellow Plebe,


Wednesday, November 19, 2014

Polar Express Inspired Nails

I am so excited to share this weeks #whatruwearingwed nail art design. Today my husband and I are taking our 22 month old daughter on The Polar Express train ride. I know it's a little early for Christmas stuff especially since Thanksgiving hasn't happened yet but we couldn't wait. This ride is very popular here and if you don't get tickets early you don't get them at all. So for my nails today I did some simple Polar Express inspired nails.


I started with a China Glaze 'New Birth' from the Giver Collection.


I then did a sponged gradient using China Glaze 'New Birth', 'Five Rules', and 'Intelligence, Integrity, & Courage' all from the Giver Collection.


I then hand painted the word "Believe" across three of my fingers and painted a jingle bell on the fourth. I used Revlon 'Emerald' for the green, Anise 'Gold Nugget' for the gold, China Glaze' 'Seeing Red', and a little bit of Sinful Colors 'Black on Black'.  I repeated this on my left hand but changed the order starting at the pinky and working across to my pointer.


I am so excited about our trip today and can't wait for the Holidays to get into full swing. I hope you enjoyed this #whatruweaingwed nail art design and I hope you'll share your current manicure. Head over to my Facebook page and post your nails there or use the mentioned hashtag on Instagram. Be sure to like/follow me while you're there. You can also follow me through Google+Bloglovin, and/or Pinterest. Thanks for stopping by, see you next time. 

Your Fellow Plebe,


Wednesday, October 22, 2014

Think Pink Galaxy Nails

For this week's #whatruwearingwed post I decided to do my weekly Think Pink nail art design for Breast Cancer Awareness month. I have never done Galaxy nails before and I thought they would be a great tribute to those that faced breast cancer and did not survive. According to nationalbreastcsncer.org, breast cancer is the second leading cause of death of women. Of the estimated 220,000 women diagnosed with breast cancer in the United States approximately more than 40,000 will not survive. So, let's all take a moment and remember those that are no longer with us...

On to the nails...


Materials
Base and top coat
Black polish
3 or more shades of pink polish
White polish
Makeup sponge
Small brush or dotting tool

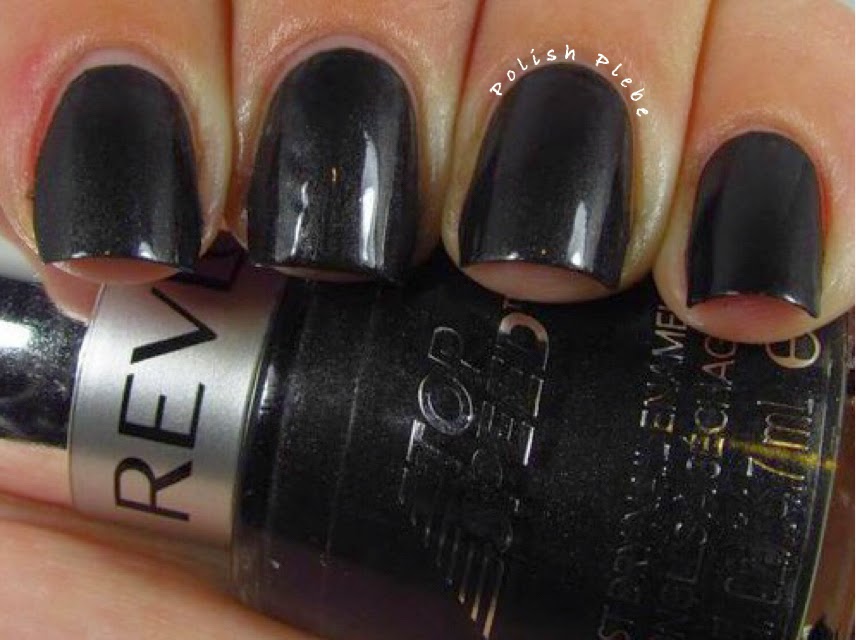
I started this design off with my favorite metallic black polish Revlon 'Black Star' appropriately named for galaxy nails.


To create the galaxy affect you'll need small pieces of sponge to layer your polishes. I simply ripped piece from a makeup sponge I had. I found the smaller the pieces I had the more control I had. Of course, the smaller the pieces the harder they are to hold so you'll most likely want to use tweezers to hold the sponge pieces. I ended up ripping the pieces in this picture in half or in thirds.


For my first layer, I used Zoya 'Dot'. This first color is a very pale cream, because I am going over black I had to do four layers. You want to apply the layers very thin to get the galaxy affect. I blotted my sponge on a paper towel before dabbing it on my nail. This helps to avoid blobs and smudging.  Simply use the small sponge pieces and dab and area of your nails, you want the layer to be semi opaque but loose so that the base color shows through slightly.


For my next layer I used Sephora by OPI 'What Aura Gonna Wear?' With this layer you want to keep the color mostly centered of your previous layer. Leave some of the previous layer showing around the edges.  I did two layers of this darker pink.


For my last galaxy layer I used Sinful Colors 'Glass Pink'. This polish is a mostly transparent pale pink sparkly polish. I used it primarily for the sparkle. I dabbed this layer over both of the previous layers but not over the entire nail. I think adding a sparkly or metallic polish really lends to the galaxy look.


To complete the look I used Sinful Colors 'Snow Me White' with a small brush to place small dots and star burst in and around my galaxies. After a little clean up I added my favorite top coat like (almost) always.


This nail art design is awesome and so incredibly easy. That means it's great for newbies and it's easy to do on both hands. I am so glad I finally got to try this nail art design and I'm sure I'll be doing it again.


I hope you enjoyed my #whatruwearingwed nail art design. I'd love to see what your wearing today, you can head over to my Facebook page and post your pictures there. Or if you prefer Instagram, post your pictures with the above mentioned hashtag and tag @polish_plebe. While your there like/follow me or follow me by clicking the "Join this Site" icon on the top right hand side of the screen or through Google+Bloglovin, and/or Pinterest. Enjoy the rest of your week, thanks for stopping by, see you next time.

Your Fellow Plebe,


Wednesday, October 15, 2014

Think Pink Cheetah Print Nail Art

Happy Wednesday Everyone! I have had such a busy week (again) that I have had little time for nail art. I managed to make some time to make this #whatruwearingwed nail art design for you. I went with pink today in support of Breast Cancer Awareness month, however, you can do this design in any colors you'd like.


Materials
Base and top coat
Two shades of polish (in this case two shades of pink)
Toothpick (or small dotting tool)

I started off with two clean coats of OPI 'Suzi has a Swede Tooth' from the Nordic collection.


Then using a toothpick I created a cheetah print. A cheetah print is very similar to a leopard print both in appearance and technique. The only real difference is that with a cheetah print the center is not colored, so it requires one less step than a leopard print. To create the cheetah print draw small half circles or misshapen C-shapes in your alternate color. My second color is OPI 'I Love Applause' from the Muppet's Most Wanted collection. Continue creating your C-shapes leaving some space, fill in large
gaps and blank spots with misshapen dots.


I did a full cheetah print on my ring fingers and for all the remaining fingers I just printed on one side of my nail allowing the print to travel a little across my smile line and tip.


This is another great nail art design for newbies because it does require precision to look good. It's also great because you can do it with almost any color combination too.


I would like to dedicate this nail art design to all the wild women out there that have starred breast cancer in the face and fought their battle. The strength and courage of breast cancer survivors I have had the pleasure to meet is astounding.


I hope you enjoyed this #whatruwearingwed manicure, I'd love to see what your wearing (on your fingers) today. Maybe you are wearing something pink, or perhaps a spooky Halloween design, or something festively fall whatever it is I'd love to see it. If you'd like to share your #whatruwearingwed manicure head over to my Facebook page and post your pictures there. If you prefer Instagram post your pictures with the above mentioned hashtag and tag @polish_plebe so that I can find it easily. Don't forget to like/follow me while your there, or you could follow me through Google Friend Connect by clicking the 'Join this Site' Icon on the top right hand side of the screen or through Google+Bloglovin, and/or Pinterest. Thanks for stopping by, see you next time.

Your Fellow Plebe,


Wednesday, October 8, 2014

Simple Elegant Spider Charm Manicure

I don't know about all of you but I have been having a crazy week! Things have been moving so fast I haven't had time for my nails, luckily now that they are shorter they're a little easier to manage and don't require as much maintenance. Earlier this week I received an order from bornprettystore.com (BPS) which included some goodies I had order to create some Halloween nail art designs. What better way to share these items with you than a #whatruwearingwed manicure?


Materials
Base and top coat
Red polish
Silver polish
Stamping plate (you can always hand paint your spider-web design if you prefer)
Charm

I started off with two coats of Sephora Formula-X 'Atom + Eve' topped of with Seche Vite. This is one of the first polishes I bought this year at the beginning of my polish obsession and I love it! I don't often wear red because it stains my fingers, but it is hard to resist this beautiful shimmery red. This is one of those polishes you have to see in person because no camera can do it justice.


I then used BPS stamping plate QA26 (item #5689) specifically the spider web design in the center, along with OPI 'My Signature is DC' (from the Coca- Cola collection) to stamp web patterns on all my nails.


I have had some issues with stamping in the past and this is the first time I have had anything come out marginally well. I also applied another coat of Seche Vite at this point.


I then applied this very pretty BPS Spider Charm to my ring finger (item #16739).  These spider charms are both creepy and pretty!


I have had some questions regarding application of studs and charms. Typically, if I'm applying a small stud or gem I apply it by placing it over a slightly wet to tacky polish or top coat and then apply another layer of top coat over the stud or gem. In this case the charm is significant in size so applying it with a top coat is not practical. For this size charm I simply applied it using nail glue.


This is the first time I have applied a charm as large as this. I have avoided charms of this size in the past because I thought they would be cumbersome. I feared they would snag on things and tear off easily. Believe it or not, I applied these late yesterday evening and to my surprise they haven't budged. Because of the legs on this charm, I have had them snags some things. For instance I like to crochet in the evenings (unless I'm doing my nails), and last night my yarn kept getting stuck in the spider legs. However, it was far less terrible than I thought it would be.


I'm really happy with this design because I have successfully stamped an image and I got to use a new charm, who thought spiders (eek!) could be so pretty? I think the success of the stamping can be attributed to the plates, the polish, and the new stamper I also got from BPS (item #15851). Of course, I do need to and want to practice my stamping technique more. If you are interested in any of these products check out bornprettystore.com. When you make a purchase use my coupon code: CREATEX31 for 10% off your order. Remember, this code doesn't expire so write it down and use it every time.


I hope you enjoyed this elegant yet slightly creepy #whatruwearingwed manicure. If you would like to share what you've got on your nails today head over to my Facebook page and post your pictures there. If you prefer Instagram post your pictures with the previously mention hashtag and tag @polish_plebe in your comments. While your there like/follow me or follow me by clicking the 'Join this Site' icon on the top right hand side of the screen, or through Google+Bloglovin, nd/or Pinterest. Thanks for stopping by, see you next time.

Your Fellow Plebe,


Social Gadgets

Random Nail Art

Background