Wednesday, December 3, 2014

Glitzy Gift Wrapped Nails

Today's #whatruwearingwed nail art design is the second nail art entry for NPQ's 12 Days of Christmas nail art challenge: "Eleven Pretty Presents".  I personally like my presents wrapped in fancy papers with big bows.


Materials
Base and top coat
Glitter polish
Red polish
Black polish
Stripping brush

I started this design off with Milani 'Gold Glitz.'  I found this polish recently at my local dollar store and couldn't pass it up.  If you have a dollar store near you I recommend you check it out periodically.  I was really amazed to find this gorgeous glittery gold there.  This is a two coat application.


I then used China Glaze 'Seeing Red' from the Giver collection and a stripping brush to draw horizontal lines across my nails.  I drew this slightly higher than I would for a french tip but not quite at the mid point of my nail.


On my accent finger, in this case my ring finger, I drew a vertical strip down the middle of my nail with the same red.


I then began drawing a bow in the red polish in the middle of my t-shape on my ring finger.  I started the bow of by drawing an x-shape over the center of the t-shape.  I then enclosed the ends of the x-shape and filled it in.


I finished off the look by using Sinful Colors 'Black on Black' and the same stripping brush I used previously to outline my ribbon and bow.


These nails are so cutely wrapped, ready to be set under the Christmas tree.  Now I just need to get my Christmas tree.  Don't forget to head over to my Facebook page and post your #whatruwearingwed manicure.  You can also use the previously mention hashtag on Instagram, and tag me @polish_plebe in the comments so that I can find it easily.  Please be sure to like and follow me while you're there. You can also like and follow me by clicking the 'Join this Site' icon on the top right hand side of this page, or through Google+Bloglovin, and/or Pinterest.  I hope you enjoyed this nail art design, and I really hope you'll share what's on your fingers today, thanks for stopping by, see you next time.


Your Fellow Plebe,

Tuesday, December 2, 2014

ROYGBIV Waterfall Nail Art

It has been a while since I have participated in the Nail Polish Queens weekly nail art challenge but I really wanted to participate in this weeks ROYGBIV challenge.  I really appreciate color, all colors, though I have my favorites, of course.  I had a hard time deciding what I was going to do exactly but I decided to try a style I have not yet.


Materials
Base and top coat
White polish
Nail Art Strippers in every color of the rainbow

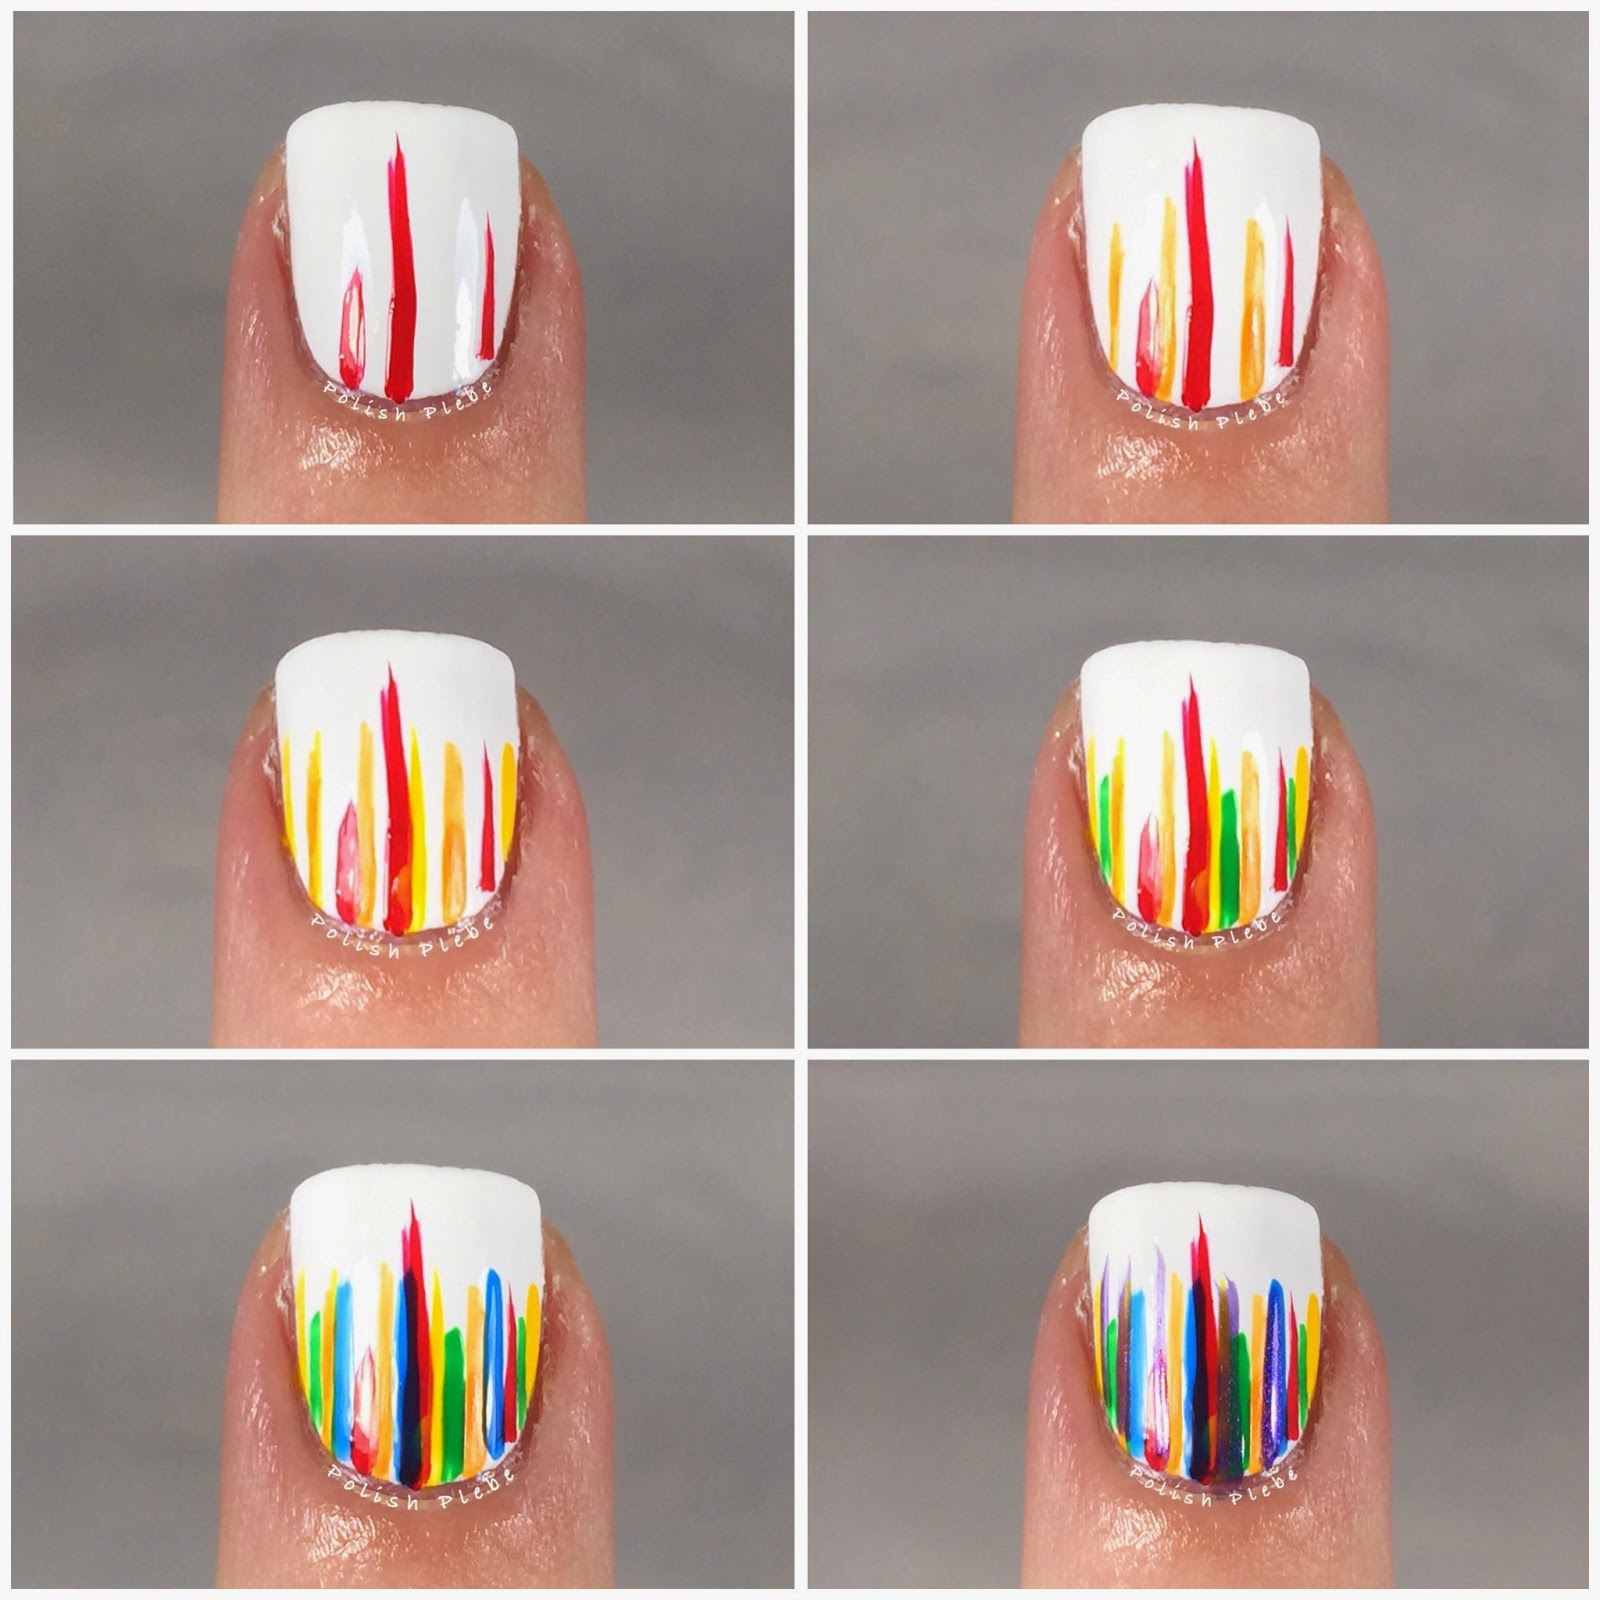
I started off with a white base color.  I used my favorite Sinful Colors 'Snow Me White.'


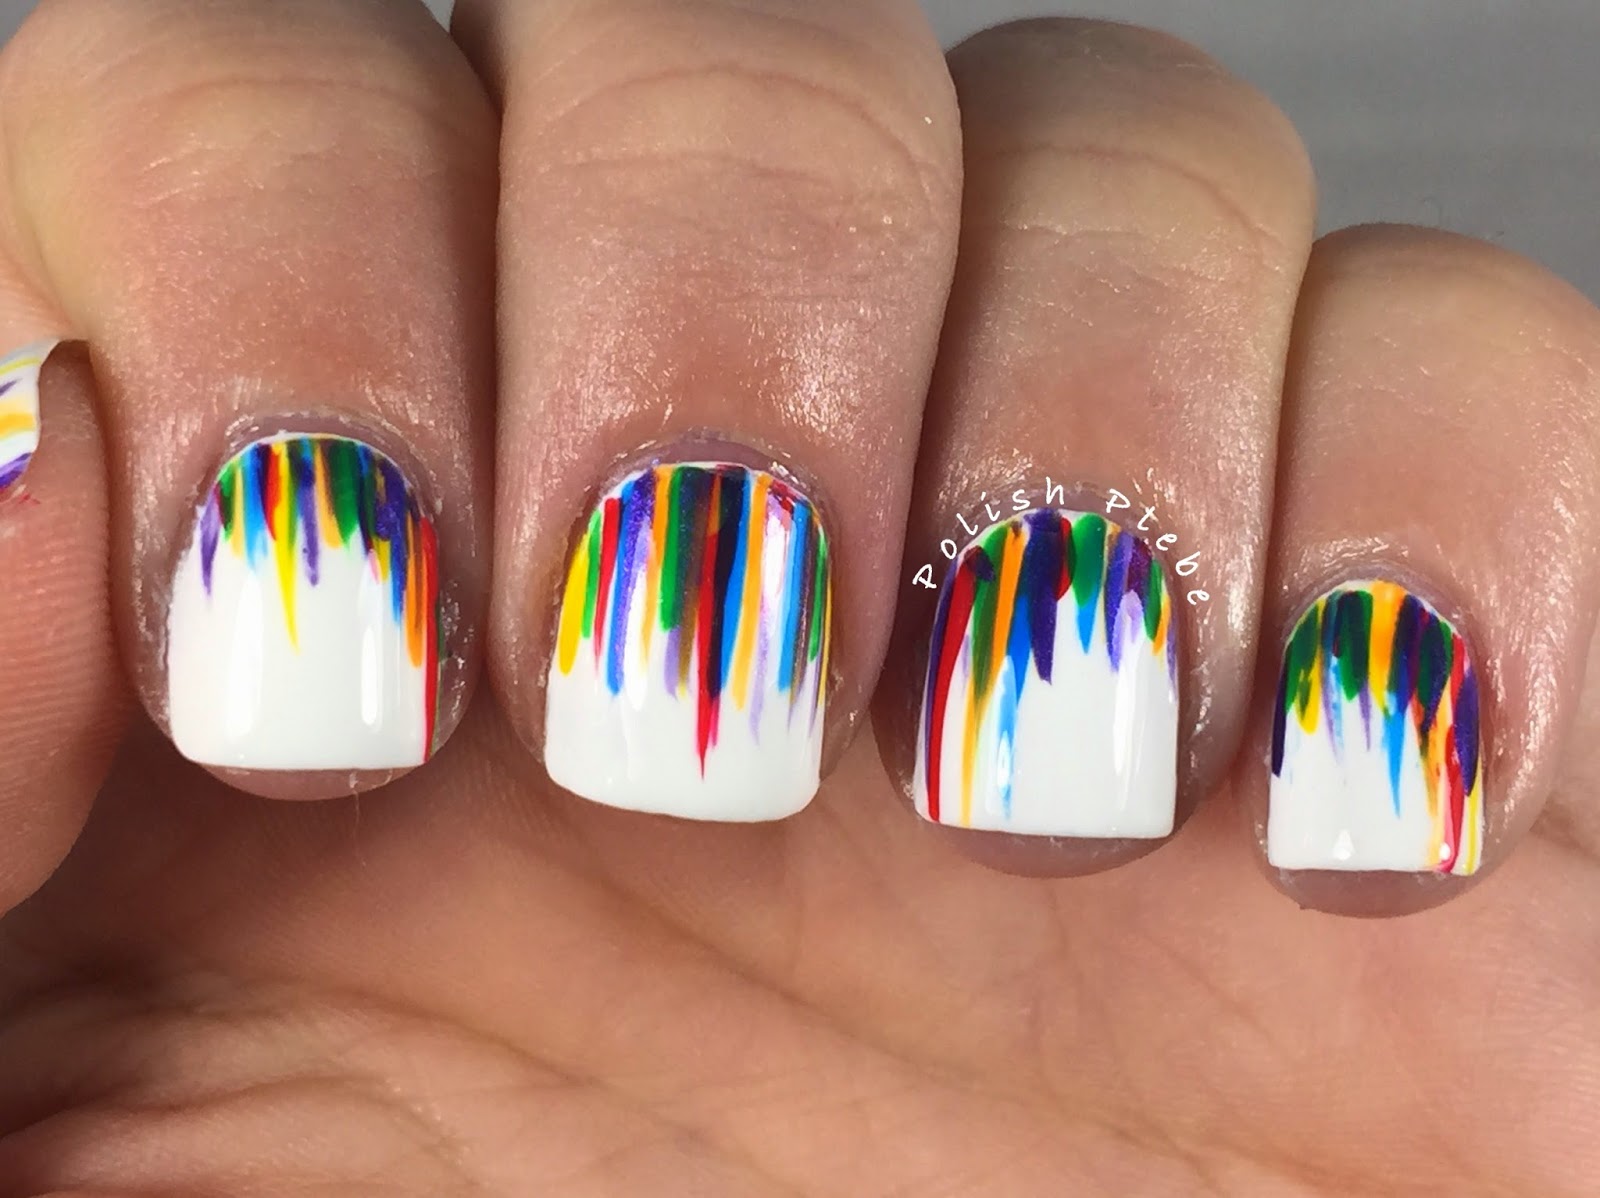
I then took turns with different nail art strippers layering each color of the rainbow.  I allowed some of the colors to overlap but tried to fill in all the spaces.


I attempted to create a somewhat cascading affect by shortening and lengthing the waterfall differently on each nail.


I love this look!  It is probably the easiest type of nail art I have ever done.  It requires little to no skill.  I really like the way the white really makes the color stand out.  I hope you enjoyed this super simple and easy nail art design.  I hope you will give it a try too.  Thanks for stopping by, see you next time.


Your Fellow Plebe,


Monday, December 1, 2014

Christmas Lights Nail Art


It's time to get into the Christmas spirit. I've decided to join the Facebook group Winter Nail Art Challenge. The first of the challenges are for lights or candles this also happens to be the first of the Nail Polish Queens 12 Days of Christmas. I was inspired by Nail Polish Queens' +Nail Envy Christmas light manicure and created this version of Christmas lights.


Materials
Green nail polish (or glitter)
Black nail art stripper
Multiple polishes
Dotting tool
Small detail brush

I was originally going to start this off with a green glitter base but instead decided to start off with Zoya 'Staasi'. This is a perfect sparkly green just right for any holiday nail art design.


Then using a black nail art stripper I drew a light sting all the way across my nails occasionally looping it.


Using the same stripper I drew small squares. These are the bases that you would plug in the lights.  You can see they are not perfect but they will be partially if not mostly covered by the bulbs.


Then using a small dotting tool and an array of polishes I created the light bulbs. Alternating colors I dotted a bulb onto each bulb base I previously painted. The red I used was OPI 'Coca-Cola Red', the yellow is Butter London 'East End', the orange is Butter London 'Brick Lane' and the blue is Butter London 'Giddy Kippers'.


To make the bulbs look more like Christmas lights I used a small brush and made the lights slightly pointed on the end.


I applied my favorite top coat to give it a glossy shine. I love the Holiday season especially all the lights, I can't wait to put up my decorations. Christmas lights just make everything cheery and bright. I hope you enjoyed my first Christmas nail art. Thanks for stopping by, see you next time.  

Your Fellow Plebe,


P.S.   For those of you who might be interested here is the calendars for both the Winter Nail Art Challenge and the NPQ's 12 Days of Christmas:


Social Gadgets

Random Nail Art

Background