Showing posts with label Nicole Diary. Show all posts

Friday, July 15, 2016

Coloring Book Nails - Nicole Diary Water Decal Review

Hello Lovelies! Today, I have another set of Nicole Diary water decals to share with you. This time I've added a fun little twist that will help you customize your water decals so you can create a look all your own. I created my look with these water decals that are a black outline floral design over a clear background.


The nice thing about these decals is that because they are relatively simple (black and clear) you can do so many different things to make them look unique. You can place them over a gradient, a smoosh, any shade of polish you like, really the possibilities are endless. I started with a simple white base. 


I then applied the water decals to all my nails. If you would like a pictorial on how to apply these water check out my previous review Black, White, & a Pop of Color


As usual perform any necessary cleanup and apply your favorite topcoat. 


And there you have a beautiful black and white design with little effort. Now you could leave it at that, there is always a time and a place for a black and white manicure. But maybe you're looking for something different...

Apply a matte topcoat, and allow to dry completely. I only let my topcoat dry for about 30 minutes and I should have waited longer. Of course, different matte topcoats will have different drying times. Just be sure that the topcoat isn't soft, if you can touch it and not leave a fingerprint you should be safe to proceed. 


Then bust out your favorite markers and start coloring. I personally prefer my fine tip Sharpies, which are perfect for this small print. I recommend a stippling motion for coloring in the design. 


When your done you can apply a glossy topcoat. I left mine matte because I wanted this to look like the pages of a coloring book. 


This is a great way to personalize a water decal design and it is very easy to do. 


You could also wear the black and white design for a little while and then add the color later. 


You can find these and othe Nicole Diary water decals through their Amazon or Aliexpress stores. They offer a wide range of unique water decals and other nail art supplies. You can use my code TAL2016 to get a free gift with you purchase. I hope you enjoyed this personalized water decal design and found the tutorial useful. Thanks for stopping by, see you next time.


Your Fellow Plebe,


Monday, June 27, 2016

Black, White & a Pop of Color - Nicole Diary Water Decal Review

Hello Lovelies!  Okay some of you may be getting sick of seeing me use water decals in my nail art designs because I have been using them a lot lately.  But I just can't get enough of these decals from Nicole Diary.  Even though they sent me these and the last several others you've seen from me for review, I recently order a whole bunch more (so be ready to see a great deal more). However, I'm trying to change up how I use them each time.


This time I am using Nicole Diary 27 , these are very pretty lotus like mandala designs.  They are black outline with clear background.


For this overall look, I used Envy Lacquer 'Illuminacion,' 'Razzmatazz,' and Sweet & Sour Lacquer 'Scotty Doesn't Know.'


For the mid finger, I painted half with 'Illuminacion,' and the other half with 'Razzmatazz.'  To cover the horizontal seam between the two colors I used black studs (I believe I purchased on Amazon).


For you added pleasure I placed one of the mandala-ish water decals on my ring finger.  I used the same steps I have in previous water decal applications, however, one additional thing that I found useful is to apply a quick drying topcoat (and allow it to dry) before applying the decal.  This helps smooth the base polish especially if it has some texture to it.  So the steps I recommend are as follow (not all steps are photographed):
  1. Apply quick drying topcoat (allow time to dry)
  2. Trim decal
  3. Remove plastic film
  4. Submerge in water for approx. 20-30 seconds
  5. Remove decal from water
  6. Carefully slide decal from backing
  7. Dip finger in water (that you are applying the decal to) to moisten
  8. Place decal, carefully slide it into place, and press flat to smooth out wrinkles
  9. Use acetone and a brush to dab away excess decal
  10. Apply a final layer of quick drying topcoat 

I love this look, it is simple yet interesting.  I think these lotus mandala water decals are my favorite from Nicole Diary, so far.  They make a perfect accent, and I love that there different designs and not just a sheet of the same ten patterns.  This means you get five fresh new looks to use, or you can use them all at once for a very intricate nail art design.


If you haven't checked out Nicole Diary's water decals you should.  You can find them on Amazon or Aliexpress.  They offer their own water decal designs as well as stamping plates, and many other nail art tools and supplies.  If you make a purchase use code TAL2016 (type it in the comments to seller) for a free gift.


I hope you enjoyed this nail art design as much as me!  Keep your eyes open for more Nicole Diary water decal designs because I'm sure I'll be doing more with them.  Thanks for stopping by, see you next time.

Your Fellow Plebe,


Tuesday, May 31, 2016

Floral over Gradient - Nicole Diary Water Decal Review

Hello Lovelies!  I hope you all had a fun and safe Memorial Day weekend.  I was fortunate enough to spend time with family, and show off our new little guy a bit.  While I was hanging out with my family, I actually had a few minutes of baby free time.  This has become such a rare treat that I do my nails whenever the opportunity arises.  So, I decided to do a design and try out another of the Nicole Diary water decals they had sent me.


These pretty floral decal is Pattern 05.  You can purchase them through either Nicole Diary's Amazon store or their Aliexpress store.

It has been so long since I've created a gradient, I really wanted to do one with this design.  It is one of my favorite techniques.  Gradients are relatively easy but require a little extra prep time.

I started off with a white base.  You can either use white or the lightest shade of your gradient combo.  White happens to be the lightest color in my combo.  I also prefer to do a three shade color combo, but you can create a gradient with as few as two colors.


I also prepped my fingers with liquid latex for a quicker clean up.  If you don't have liquid latex (or the equivalent for those with latex allergies) you can also use tape.


To create the gradient, I use a make up sponge.  I dampen the sponge with water, because I feel this helps create a smoother blend.  However, this is not necessary, just a personal preference.  Then load the sponge with polishes, I am creating a horizontal linear gradient with Salon Perfect 'Sugar Cube,' China Glaze 'Spring in My Step,' and 'Strike a Rose.'  Then just dab, dab, dab.  Reload the sponge as necessary. 


I like to remove the latex and do a small bit of clean up with gentle acetone and a brush at this point before proceeding.  Of course, if you don't have or don't want to apply decals you should apply a topcoat to finish.
 

I then applied the water decals, as I have done in the past.  Start by trimming the decals, because my nails are short I trim the decals in half so that I get double the use out of a sheet (in other words I get two full manicures instead of one).  Remove the protective covering, and submerge the decal in water for approximately 20-30 seconds.  Remove the decal from the water, and carefully slide the decal from the backing.  Moisten the nail, and then place the decal on the surface.  Gently smooth out any wrinkles.  Remove excess decal with a brush and gentle acetone.


Of course, you should apply a topcoat to officially seal the decal.  When applying your topcoat I recommend you float the topcoat over the nail.  If you apply the topcoat too thinly there is the potential of damaging the decal design.


I really like these Nicole Diary water decals.  All of the ones that have been sent to me are a pattern over a clear backing.  That means that whatever polish color you choose is the background color of the design.  That leave endless possibilities for creating different designs all with one pattern. 


I really like how this pattern looks over the gradient.  The gradient makes the decals look really unique and the decals take a simple gradient to the next level.


I'm really falling in love with Nicole Diary water decals (in fact, I just ordered a whole bunch).  Their designs are unique and gorgeous, and the prices are reasonable.  If you place an order you can use code Tal2016 for a free gift.  Just type the code in the comments to the seller, to receive a free gift valued between $2-$5.


I hope you enjoyed this nail art design as well as found the tutorial and review useful.  Thanks for stopping by, see you next time.


Your Fellow Plebe,


Friday, May 13, 2016

Nautical Nails - Nicole Diary Water Decal Review

Hello Lovelies!  As many of you know I have been extremely busy lately with our new baby, and our very active three year old.  That means that I don't have a great deal of time to do my nails.  Recently, I was contacted by Nicole Diary asking if I would like to review some of their water decals.  Water decals are a very speedy way to create amazing and beautiful nail art designs, with little effort or skill required, so of course, I said yes.


I love nautical nail designs, that is why I chose this pattern to review for you guys first.  As you can see the packaging is clean and simple.  On the back of the package, the directions are printed clearly, largely, and are very easy to understand.  I feel this is very important because many newbies or inexperienced nail fiends may need these instructions.  I have come across many nail art product instructions that are either in a foreign language (foreign to me), or are translated so poorly that they make no sense at all.  Based on this alone I am already impressed by Nicole Diary.


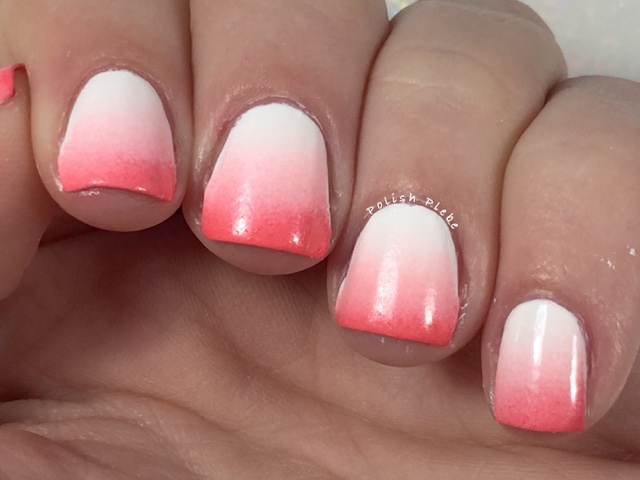
However, the real proof is in the pudding (yum pudding!), so I tried them on myself.  For the nails I intended to use the decals on I painted them white with Sally Hansen Xtreme Wear "White On."


These decals, as you can see are full nail decal.  On the sheet there are ten decals that vary slightly in size, enough for one full manicure, or if you have short nails like mine, you can probably get two full manicures from this one sheet.  The decals are not individual, meaning that you do need to cut them from the sheet.  If you look closely you can see where one pattern starts and the other ends, making them easy to cut out.


After you select the appropriate size, cut the decals out.  If you have short nails, cut the length of the decals shorter to make the application easier (or to use them on multiple nails).  Some people like to cut one end of the length curved to match the arch of their cuticle line, I always screw this up so I don't bother.

Remove the protective plastic from the surface and submerge the decal in water for about 20-30 seconds.

Remove the decal from the water.  I recommend using tweezers, this allows you to get a good grip without accidentally sliding the decal from the backing before you are ready.  Carefully, slide the decal from the backing.

Though the instructions don't tell you to do this, I recommend you wet the nail that you are placing the decal on.  This allows you to slide the decal on the surface of the nail so that you can achieve the placement you like without wrinkling or ruining the decal.  Place the decal on the nail, and allow to dry for a few minutes.

Because, I didn't trim the decal to the exact size of my nail, I ended up with some of it on my skin.  This is easily removed using gentle acetone and a brush.  I recommend using a dabbing or stippling motion when cleaning the decal from your skin.  Swiping the brush may pull the decal out of place if it isn't dry enough.


Lastly, apply your favorite topcoat, and ta-da!  You have an amazing nail art design without putting in hours upon hours to hand paint it.  I paired these decals with a striped pattern I painted using straight vinyls, Sinful Colors "Endless Blue," and I AM Custom Color Cosmetics "Woop, Woop, Woop!"  You can't have nautical nails without some stripes.


You can find Nicole Diary products through Amazon and Aliexpress.  In addition to their own brand water decals, they also have their own brand of stamping plates for all you stamping lovers out there.  They do offer other supplies as well.  I found the shipping to be surprisingly quick too,  I received the decals about a week after I made my selections.  This is impressive because they shipped from China to New York in that time.


All in all I am very impressed with Nicole Diary and their water decals. I personally love how this design turned out.  The decals were incredibly easy to work with, making my life very easy (well at least made this nail art design very easy).  The pattern choices are beautiful, the packaging is clean and simple, the instructions are legible and make sense, the price is good, and the shipping was quick.  I seriously want every pattern they offer, there really isn't one I don't like.


I hope you liked this nail art design and found the review useful.  Thanks for stopping by, see you next time.

Your Fellow Plebe,


Social Gadgets

Random Nail Art

Background